Showing posts with label Trick. Show all posts

Laptop adalah contoh barang elektronik
yang sangat dibutuhkan oleh kebanyakan orang. Laptop pun sama halnya
seperti manusia yang harus selalu dirawat, cara merawat laptop
tidaklah susah tetapi tidak juga untuk di sepelekan karena hal ini
sebenarnya sangat penting agar Laptop tersebut memiliki umur yang
panjang atau awet dan tahan lama.

Kali ini MB akan membagikan tips bagaimana cara menyembunyikan file kedalam gambar. Gunanya apa? Gunanya adalah menjaga dokumen rahasia sobat tetap aman dari pencuri-pencuri dokumen.
Sebelumnya pastikan bahwa komputer/laptop sobat telah terinstall WinRar, langsung saja ke caranya :
 Defacing adalah merupakan bagian dari kegiatan hacking web atau
program application, yang menfokuskan target operasi pada perubahan
tampilan dan/atau konfigurasi fisik dari web atau program aplikasi tanpa
melalui source code program tersebut. Sedangkan deface itu sendiri
adalah hasil akhir dari kegiatan cracking dan sejenisnya – tekniknya
adalah dengan mbaca source codenya (ini khusus untuk konteks web
hacking), trus ngganti image (misalnya), editing html tag dkk, dan
lain-lain.
Defacing adalah merupakan bagian dari kegiatan hacking web atau
program application, yang menfokuskan target operasi pada perubahan
tampilan dan/atau konfigurasi fisik dari web atau program aplikasi tanpa
melalui source code program tersebut. Sedangkan deface itu sendiri
adalah hasil akhir dari kegiatan cracking dan sejenisnya – tekniknya
adalah dengan mbaca source codenya (ini khusus untuk konteks web
hacking), trus ngganti image (misalnya), editing html tag dkk, dan
lain-lain. Semenjak
mouse ditemukan dengan satu tombol pada tahun 1963, akhirnya perangkat
penunjuk ini mempunyai tiga sampai dengan lima tombol pada tahun 1990.
Semenjak saat itu, mouse seperti menjadi sebuah perangkat kontrol yang
wajib untuk setiap PC, selain keyboard.
Semenjak
mouse ditemukan dengan satu tombol pada tahun 1963, akhirnya perangkat
penunjuk ini mempunyai tiga sampai dengan lima tombol pada tahun 1990.
Semenjak saat itu, mouse seperti menjadi sebuah perangkat kontrol yang
wajib untuk setiap PC, selain keyboard.
Karena dengan menggunakan mouse,
mobilitas Anda untuk mengaktifkan program-program yang berbeda akan
semakin mudah dan cepat.
 Chatting adalah kegiatan yang mengaksikan, bahkan setiap hari saya selalu chatting. Chatting adalah kata bahasa Inggris yang asal katanya Chat. Chat dapat diartikan Obrol dan Chatting adalah mengobrol, namun chatting disini bukanlah chatting biasanya, chatting disini adalah chatting via Internet, kebanyakan orang menggunakan Facebook untuk chatting (termasuk saya) Namun tahukah kamu aturan-aturan chatting? Baiklah saya akan jelaskan disini.
 Mencari cara untuk dual boot Anda MAC OS dengan Windows. Untungnya Apple telah merilis Boot Camp utilitas yang memungkinkan Anda menginstal Windows SO dan Mactnitosh pada Pro.This Macbook Anda akan memberikan Anda fleksibilitas untuk menjalankan Software Windows dan Mac pada mesin tunggal. Boot Camp bekerja dengan EFI (Extensible Firmware Interface). EFI adalah perangkat lunak antarmuka antara sistem operasi dan firmware yang terbaik bagi penggantian BIOS model lama. Setelah Dual boot setiap kali Anda akan mulai Macbook Anda Anda akan memiliki pilihan untuk memulai Mac atau Windows.
 Kemarin banyak sekali teman saya bertanya 'Gan kalau mau bikin SWF dari format .mp3 gimana?' Dengan begitu saya kasih tahu caranya. Yuk simak baik-baik caranya.
File Musik dalam Format SWF
Dengan mengubah file berformat MP3 menjadi SWF, Anda dapat mendengarkan sebuah file musik tanpa menggunakan program pemutar musik seperti WinAmp.
 Facebook anda di hack orang ... ?
wah gara-gara banyaknya Software hacking facebook yang beredar, hacking facebook teman menjadi hobbi yang menarik dan mengasikkan bagi sebagian orang yang lagi gokil.
cara mengatasi facebook yang kena hack Tergantung cara nge hacknya sih sebenarnya, hacking facebook dengan login palsu ( Fake Login ) atau dengan Keylogger rasanya lebih pahit dan pekat, password anda sudah dicuri orang dan diganti sama aja dengan mampus, kita ga bisa berbuat banyak, tapi sabar cobalah menarik nafas panjang.
If you think that working on multiple Windows to open and view
different files and folder situated on different drives is a hassle. And
you wish that you could have multiple tabs for every folder or drive
you want to work on or view. Then your wish has come true with Tab
Explorer.
Tab Explorer is free software that adds tabs to Windows Explorer, thus making it look like a tabbed browser. With multiple tabs, you can easily make your life easier, thus boosting your productivity. Unlike QTTabBar, it doesn’t let different folder opens as tabs, but display a list of multiple tabs over the file menu, in each and every Window.

This makes accessing multiple folders and drive easy, as you can view any drive or folder from any tab. Having multiple tabs for multiple Windows on each Windows is what makes Tab Explorer a very user friendly application. The tab interface of Tab Explore looks more or less like Google Chrome tabs.
Tab Explorer is free software that adds tabs to Windows Explorer, thus making it look like a tabbed browser. With multiple tabs, you can easily make your life easier, thus boosting your productivity. Unlike QTTabBar, it doesn’t let different folder opens as tabs, but display a list of multiple tabs over the file menu, in each and every Window.
This makes accessing multiple folders and drive easy, as you can view any drive or folder from any tab. Having multiple tabs for multiple Windows on each Windows is what makes Tab Explorer a very user friendly application. The tab interface of Tab Explore looks more or less like Google Chrome tabs.
 One of the simplest ways to connect two PCs is through a hardware USB
cable, so you can cable transfers files between two PCs - it's a network
which is formed to share connections. There are various USB-USB cables
for sale. Choose the "bridged" one, also known as the "USB networking
cable", which has an electronic circuit at the centre for
interconnection between two PCs. The other cable, known as A/A USB, has
two standard USB connectors at each end, without a bridge chip that
makes it useless to connect two PCs. As a matter of caution, it can burn
the USB ports and the power supplies connected with the A/A cable. A/B
USB cables connects only printers and canners . For a high-speed use, a
USB 2.0 cable has a better transfer rate than a standard network
connection, so it's usually preferred
One of the simplest ways to connect two PCs is through a hardware USB
cable, so you can cable transfers files between two PCs - it's a network
which is formed to share connections. There are various USB-USB cables
for sale. Choose the "bridged" one, also known as the "USB networking
cable", which has an electronic circuit at the centre for
interconnection between two PCs. The other cable, known as A/A USB, has
two standard USB connectors at each end, without a bridge chip that
makes it useless to connect two PCs. As a matter of caution, it can burn
the USB ports and the power supplies connected with the A/A cable. A/B
USB cables connects only printers and canners . For a high-speed use, a
USB 2.0 cable has a better transfer rate than a standard network
connection, so it's usually preferredIf you have to transfer large files from one PC to another, using a flash disk or burning a CD-ROM can seem like a waste of time. One wise way to transfer these files quickly between two computers would be to use a USB-USB cable.
What to choose?
To be able to make the transfer, you will need:1. An Ethernet crossover cable
2. A null modem serial cable. If you don't have one, you can use a parallel peripheral cable.
3. And finally special-purpose USB cables.
How does it work?
The Ethernet network will allow you to transfer data between more than two PCs. One of the computers must have an Ethernet adapter, even if the others have a USB port as you can make use of the crossover cable. You can do this by plugging a USB-to-Ethernet converter device in the other computers that possess a USB port.The cable that you should use to connect two PCs together is called a "USB networking cable". A tiny electronic circuit is used in the middle of the connection to allow the two PC to send data to one another. You should bear in mind that if you are using serial or parallel cables, you will not be able to transfer data between more than two computers. It is therefore recommended you use a Direct Cable Connection to be able to get the same specifications as an Ethernet cable.
You can make use of a USB 1.1 or USB 2.0 bridge chip to enhance the speed of your transfer. You must also bear in mind that you need an Ethernet network that works at 100 Mps or more to ease your transfers.
What to do?
- 1. Both computers should be switched on and logged in into the "Administrator" account.
- 2. On the USB port computer, plug in the USB bridge to the USB slot and the end bridge in the other computer.
- 3. You must now install the USB bridge cable driver software when you are asked to. Remember to install it as a link adapter or a network adapter.
- 4. If you choose to install a link adapter, you will be allowed to transfer files from one PC to another but if you choose to install a network adapter, you will be able to access the whole network's PCs.
- 5. When installation is complete, you should be able to start the data transfers between the computers connected.

Need to hide a folder or two on a Mac? A while back we showed you how to make invisible folders and to even how to make hidden folders in Mac OS X, but now we’re going to demonstrate how to turn an existing folder into a hidden folder.
How to Hide Folders in Mac OS X
Hiding existing folders is fairly easy:- Launch the Terminal, found in /Applications/Utilities/ or from Launchpad
- Type the following command:
- When finished, close out of Terminal
chflags hidden /path/to/folder/chflags hidden ~/Secrets/The folder will immediately disappear from visibility, becoming hidden from the Finder. This includes everything contained within the folder as well, whether they are more files or other folders.
If you want to truly hide the folder and it’s contents, take an extra step and exclude the folder from Spotlight indexing. This makes sure that none of the files inside of it can be found through the Spotlight search feature in OS X.
While this hides folders from being visible in the GUI and will keep 95% of users unaware of the folders existence, keep in mind that practically anything is visible from the command line, and if an advanced user was keen or determined enough, they could probably track down the folder or its contents.
Access the Hidden Folders in Mac OS X
Now that the folder is hidden, here is how to access it:- From the Mac OS X desktop, hit Command+Shift+G to bring up the “Go To Folder” window
- Enter the same path to the folder as you used when hiding it:

You’ll now be inside the hidden folder, able to open, copy, move, and use the contained files and folders as usual.
Unhiding the Folder in Mac OS X
If you no longer want the folder to be hidden anymore, here’s what to do:- As before, launch the Terminal application
- Enter the following command:
- Close the Terminal
chflags nohidden /path/to/folder/chflags nohidden ~/Desktop/Secret Folder/Again, the folder will become immediately visible to the desktop. If you blocked the contents from Spotlight, you may want to remove it from there as well to be able to find and locate as usual.
If you read OSXDaily with any regularity, some of this will be familiar to you for good reason. The chflags nohidden command is the same thing we use to show the Library directory in OS X Lion, and accessing the folder once it is hidden is done the same way we access the user Library folder when it’s hidden as well.

I looked into creating an animated jpg or jpeg file and found that it is actually quite simple to do. Using a program called unfreez, which can be downloaded at http://www.whitsoftdev.com/unfreez/, one can create an animated gif file. Now, to create an animated jpg or jpeg file one has to change the file extension. Therefore, if one is going to name their file kubrickheader, one will have to save it as “kubrickheader.jpg” or “kubrickheader.jpeg” with the double quotes. If the quotes are not on both sides of the filename, the file will be named kubrickheader.jpg.gif.
For those that want to make Windows XP, Vista, or 7 show the hidden extension of a file for easy editing. One can follow the instructions at http://maximumpcguides.com/windows-vista/how-to-change-a-file-extension. With that, one can easily rename the file kubrickheader.gif to kubrickheader.jpg without the fuss.
Unfortunately, animated jpg or jpeg files can be rendered by Internet browsers only. Viewing an image using a photo viewing tool will not work.
NOTE: There are probably many free programs available, such as GIMP, that can create animated gif files, but unfreez seems to be the simplest to use. Unfreez takes 2 or more non-moving gif files and creates an animated gif file. Therefore, all one needs is 2 or more non-moving gif files to add together.
An example can be seen by looking at the water at either http://aprivatebeach.com/kubrickheaderAnime.jpg or the header above. My blog, which is using WordPress 2.9, has an animated gif renamed to a jpg file for the header. Therefore, it is possible.
For those wanting to create a jpg or jpeg that looks animated using Javascript, the following will help. http://www.webdevelopersnotes.com/tips/html/animated_jpgs.php3
Question:
Is this really an animated jpg or jpeg file?
No, this file is an animated gif file with an extension of jpg. It seems that Firefox, Internet Explorer, and possibly others ignore the file extension and renders the image the way it is supposed to be. In the case above, as an animated gif file.

NOTE: Internet Explorer seems to have some problems rendering the animated jpg or jpeg file. Opening an animated jpg or jpeg file stored on a harddrive will not work, one will have to view the animated jpg or jpeg on a website and/or a webpage. Firefox does not seem to have this problem. As for other browsers, I have not tested them yet.
As for making gif files that are comparable in quality to jpg or jpeg, GIMP for Linux, Windows, Mac OS or Paint.net for Windows are very good solutions. I find the quality of the saved gif from these programs are better than MS Paint.
For those wanting to convert AKA rename an existing animated gif to an animated jpg or jpeg file using other methods, go to http://aprivatebeach.com/blog/2009/12/convert-animated-gif-to-jpg-jpeg
Create animated jpg or jpeg using tricks
As for jpg or jpeg that seem to be moving. Do a Google search for optical illusions or visit http://www.michaelbach.de/ot/mot_mib/index.html. It seems that the eyes can play tricks when it comes to pictures that can make you dizzy. I downloaded an optical illusion in jpg format that was moving, but I found out that it was just my eyes playing tricks on me. The jpg picture was not moving at all. Doing a Google images search for flowing leaves jpg will show a jpg that moves. It even moves when printed on paper.If this tutorials Not working try this Tutorial
Berikut langkah menginstal windows dengan menggunakan WinToFlash
Yang dibutuhkan:
- flashdisk ( min, 1GB)
- sebuah komputer dengan cd/dvd room untuk membuat flashdisk yang bootable
- komputer tampa cd room ( komputer yang mau di install windowsnya )
1. download WinToFlash http://wintoflash.com/download/en/
2. Extract file yang sudah didownload, lalu carifile WinToFlash.exe

3. klik windows setup transfer wizard
4.
 selanjutnya kita ada ke menu wizard mode, lalu tekan next.
5.
 pada langkah ini pilih drive (cd rom ) dimana cw installer windows berada
sedangkan untuk usb drive , pilih drive dari flashdisk kamu.
6. Setelah memilih ke 2 driver diatas, selanjutnya klik NEXT
7. selanjutnya kita akan melihat menu popup ?I Accepted the terms of the license agreement? tekan saja CONTINUE
8. selanjutnya kita akan diminta untuk memformat flashdisk kamu
pesanya sebagai berikut :
Warning! Formatting will erase ALL DATA on target disk. To format press OK, to quit press Cancel
9. setelah kita klik OK flashdisk akan di format dan selanjutnya proses transfer file installer windows ke flashdisk akan berjalan
10. Selanjutnya tunggu sampai FINISH , setelah selesai kamu sudah mempunyai sebuah flashdisk bootable dan siap untuk menginstal di setiap komputer atau laptop tanpa cd-rom
Berikut step ketika akan menginstall dengan menggunakan flashdisk bootable ini
1. masukan flashdisk di komputer yang akan di install
2. booting komputer tersebut dari flashdisk
kalau kamu belum tau bagaimana cara boot dari flashdisk, ketika kamu menyalakan komputer /notebook pertama sekali tekan F2 lalu masuk ke menu bios.
cari menu boot , lalu pilihflashdisk sebagai boot utama. lalu tekan F10 untuk Save and Exit
setelah itu restart pc / notebook kamu,
sekarang kamu sudah boot dari flashdisk dan pilih
1st, text mode setup (Boot from flash again after finished)
setelah restart pertama pilih
2nd, GUI mode setup, continue setup + 1st start of Windows

selanjutnya proses install dapat dimulai.
License:Adware/Freeware (Free to try)
Updated:21 Mar 2012
Downloads:558327
Platform:Windows (All Versions)
Publisher:Novicorp(more)
Website:novicorp.com
User Reviews:Write one now!
Other versions:0.7.0034 beta, 0.7.0026 beta
Download klik here
Jika pada saat penginstallan Windows terdapat Error harap lapor, Mungkin saya dapat membantu anda.
Yang dibutuhkan:
- flashdisk ( min, 1GB)
- sebuah komputer dengan cd/dvd room untuk membuat flashdisk yang bootable
- komputer tampa cd room ( komputer yang mau di install windowsnya )
1. download WinToFlash http://wintoflash.com/download/en/
2. Extract file yang sudah didownload, lalu carifile WinToFlash.exe

3. klik windows setup transfer wizard
4.

5.

sedangkan untuk usb drive , pilih drive dari flashdisk kamu.
6. Setelah memilih ke 2 driver diatas, selanjutnya klik NEXT
7. selanjutnya kita akan melihat menu popup ?I Accepted the terms of the license agreement? tekan saja CONTINUE
8. selanjutnya kita akan diminta untuk memformat flashdisk kamu
pesanya sebagai berikut :
Warning! Formatting will erase ALL DATA on target disk. To format press OK, to quit press Cancel
9. setelah kita klik OK flashdisk akan di format dan selanjutnya proses transfer file installer windows ke flashdisk akan berjalan
10. Selanjutnya tunggu sampai FINISH , setelah selesai kamu sudah mempunyai sebuah flashdisk bootable dan siap untuk menginstal di setiap komputer atau laptop tanpa cd-rom
Berikut step ketika akan menginstall dengan menggunakan flashdisk bootable ini
1. masukan flashdisk di komputer yang akan di install
2. booting komputer tersebut dari flashdisk
kalau kamu belum tau bagaimana cara boot dari flashdisk, ketika kamu menyalakan komputer /notebook pertama sekali tekan F2 lalu masuk ke menu bios.
cari menu boot , lalu pilihflashdisk sebagai boot utama. lalu tekan F10 untuk Save and Exit
setelah itu restart pc / notebook kamu,
sekarang kamu sudah boot dari flashdisk dan pilih
1st, text mode setup (Boot from flash again after finished)
setelah restart pertama pilih
2nd, GUI mode setup, continue setup + 1st start of Windows

selanjutnya proses install dapat dimulai.
License:Adware/Freeware (Free to try)
Updated:21 Mar 2012
Downloads:558327
Platform:Windows (All Versions)
Publisher:Novicorp(more)
Website:novicorp.com
User Reviews:Write one now!
Other versions:0.7.0034 beta, 0.7.0026 beta
Download klik here
Jika pada saat penginstallan Windows terdapat Error harap lapor, Mungkin saya dapat membantu anda.

Biasanya saat kita membuka Task Manager yang telah dimatikan/disable oleh administrator akan muncul pesan "Task Manager has been disabled by your administrator". Berikut ini cara mudah yang biasa digunakan ketika Task Manager jadi disable atau tidak muncul. Saya akan membagikan 2 cara, bagi pemula yang belum pernah membuka regedit saya sarankan untuk mengikuti cara 2.
Cara 1
- Masuk ke regedit (klik START -> RUN -> ketik regedit -> klik ok)
- Lalu cari folder berikut HKEY_CURRENT_USER -> Software \ Microsoft \ Windows \ CurrentVersion \ Policies \ System
- Coba lihat DisableTaskMgr. lalu klik REG_DWORD. Jika value: 1=Enable -> berarti TaskManager disable/mati; Value: 0=Disable (sama dengan enables TaskManager)
- Tutup regedit.
- Coba lihat tombol Task Manager apakah sudah muncul/belum, jika belum coba restart dulu komputernya.
Cara 2
Cara di atas adalah cara yang lumayan sulit. Bagi pemula saya menyarankan untuk menggunakan cara ini. Dalam cara ke 2 ini, kita akan menggunakan software Task Manager Fix. Caranya mudah sekali, Anda hanya perlu mendownloadnya, kemudian menjalankan TaskManagerFix.exe dan klik Fix Task Manager. Lihat gambar berikut.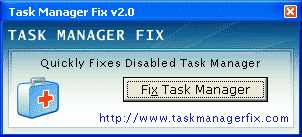
Kali ini saya akan share IDM Optimizer, IDM Optimizer adalah aplikasi untuk memaksimalkan kinerja Internet Download Manager (IDM), aplikasi kecil ini dapat memaksimalkan kinerja IDM anda dengan cara yang mudah.
Download IDM Optimizer
Extract dulu file Idm Optimizer
Cara Menggunakan IDM Optimizer:
Note:
Restore Default berfungsi untuk mengembalikan setting awal IDM


Download IDM Optimizer
Extract dulu file Idm Optimizer
Cara Menggunakan IDM Optimizer:
- Install terlebih dahulu IDM pada komputer anda
- Matikan icon tray Internet Download manager
- Jalankan IDM Optimizer lalu pilih Maximum untuk mengoptimalkan IDM
- Restart IDM untuk melihat hasil
Note:
Restore Default berfungsi untuk mengembalikan setting awal IDM
User account control atau UAC
merupakan salah satu fitur keamanan yang dimiliki oleh windows 7. Fitur
User account control ini akan membantu kita mencegah terjadinya
perubahan yang tidak sah pada setting windows. User account control ini
akan meminta ijin persetujuan dari administrator jika akan ada
perubahan setting pada windows, baik perubahan yang dilakukan oleh
software maupun perubahan yang dilakukan oleh user terhadap setting
windows.

Mengingat pentingnya User account control ini, lebih baik tetap dipasang atau diaktifkan saja guna mencegah terjadinya perubahan yang tidak diinginkan pada computer kita. Namun demikian jika shobat tetap berkehendak untuk mencoba menonaktifkan atau men disable User account control (UAC) bisa diikuti caranya dibawah ini :
Klik start kemudian ketikan UAC dan tekan enter
Pada jendela user account control setting, drag panel ke kabawah pada posisi never notify
Klik OK
Jika muncul user account control, klik Yes.
Untuk mengembalikan ke kondisi semula, tinggal mengembalikan panel keatas seperti semula.

Cara pertama (buat Mozilla) :
1. Install mozilla firefox jika belum terinstall Klik DISINI
2. Install add-ons Greasemonkey DISINI
setelah itu restart mozilanya dan akan keluar kepala monyet
3. Install facebook auto like DISINI
Setelah sudah di install auto likenya, restart mozilanya lagi dan masuk ke alamat facebook.
Dan muncul pilihan di kiri bawah MOZILA FIREFOX.D pilih *like all statuses*dan siap like status teman² ente
Note :
1. Pastikan kepala monyetnya dalam keadaan terang atau *ENABLED*
2. Hilangkan mode menjelajah aman di akun ente, caranya Pengaturan Akun terus keamanan terus Menjelajah aman di hilangkan contrengannya dan Simpan Setting.
Cara kedua (buat Google Chrome) :
1. Install Tamper Monkey silahkan Klik DISINI dan "klik" tambah ke chrome, nanti ekstensi tsb akan terdownload scara otomatis. kmudian stelah proses download selesai akan muncul box dialog "konfirmasi pemasangan" kita tggal "klik" pasang maka tampermonkey sudah terpasang di google chrome kita. lihat di sisi kanan atas google chrome ente
nb : ekstensi yg harus di pasang adalah tampermonkey yg biasa bkn tampermonkey beta.
2. langkah slanjutnya adalah "klik" kanan pada icon tampermonkey, lalu pilih "opsi" maka tampermonkey akan terbuka pada tab baru. kmudian pilih / "klik" new userscript dan kamu masukkan script di bawah
// ==UserScript==
// @name Rizkian Ancar Santoso
// @namespace AutoLike
// @description Automaticly like facebook statuses and comments
// @include http://www.facebook.com/*
// ==/UserScript==
// ==============
// ==Expand Older Posts==
body = document.body;
if(body != null) {
div = document.createElement("div");
div.style.position = "fixed";
div.style.bottom = "+102px";
div.style.left = "+6px";
div.style.backgroundColor = "#3b5998";
div.style.border = "2px solid #000000";
div.style.padding = "2px";
div.innerHTML = "<a style=\"font-weight:bold;color:#ffffff\" href=\"http://www.facebook.com/ancarsantoso\">[Made By Ancar :*]</a>"
body.appendChild(div);
unsafeWindow.AutoExpandPosts = function() {
buttons = document.getElementsByTagName("a");
for(i = 0; i < buttons.length; i++) {
myClass = buttons[i].getAttribute("class");
if(myClass != null && myClass.indexOf("lfloat") >= 0)
if(buttons[i].getAttribute("onclick") == "ProfileStream.getInstance().showMore();return false;")
buttons[i].click();
}
};
}
// ==============
// ==Statuses==
body = document.body;
if(body != null) {
div = document.createElement("div");
div.style.position = "fixed";
div.style.bottom = "+72px";
div.style.left = "+6px";
div.style.backgroundColor = "#3b5998";
div.style.border = "2px solid #000000";
div.style.padding = "2px";
div.innerHTML = "<a style=\"font-weight:bold;color:#ffffff\" href=\"JavaScript:AutoLike()\">[Like All Statuses :*]</a>"
body.appendChild(div);
unsafeWindow.AutoLike = function() {
buttons = document.getElementsByTagName("button");
for(i = 0; i < buttons.length; i++) {
myClass = buttons[i].getAttribute("class");
if(myClass != null && myClass.indexOf("like_link") >= 0)
if(buttons[i].getAttribute("name") == "like")
buttons[i].click();
}
};
}
// ==============
// ==Unlike Statuses==
body = document.body;
if(body != null) {
div = document.createElement("div");
div.style.position = "fixed";
div.style.bottom = "+52px";
div.style.left = "+6px";
div.style.backgroundColor = "#3b5998";
div.style.border = "2px solid #000000";
div.style.padding = "2px";
div.innerHTML = "<a style=\"font-weight:bold;color:#ffffff\" href=\"JavaScript:AutoUnLike()\">[Unlike All Statuses :*]</a>"
body.appendChild(div);
unsafeWindow.AutoUnLike = function() {
buttons = document.getElementsByTagName("button");
for(i = 0; i < buttons.length; i++) {
myClass = buttons[i].getAttribute("class");
if(myClass != null && myClass.indexOf("like_link") >= 0)
if(buttons[i].getAttribute("name") == "unlike")
buttons[i].click();
}
};
}
// ==============
3. "klik" save dan abra-kadabrajadilah auto like status facebook di google chrome
Semoga bermanfaat, sun duyu :*

